.png)
.png)

 2807
2807
An overview is provided in this article on how to import Statement Charges into QuickBooks Desktop (QBDT) using Transaction Pro Importer.
On the first screen of Importer, click the BROWSE button to select the import file and select STATEMENT CHARGE as the IMPORT TYPE. Then select the OPTIONS button, if any options are necessary. Click NEXT to continue.
![]()
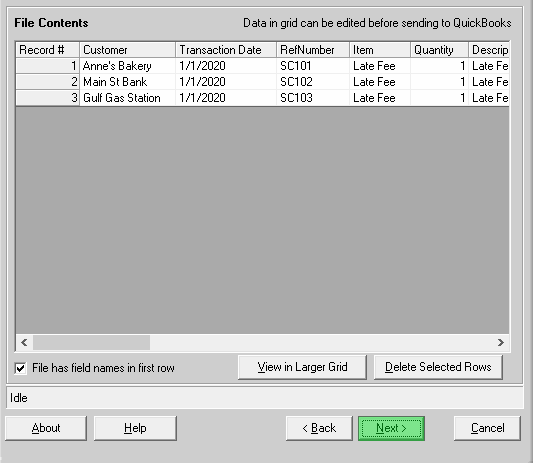
On the File Contents screen, the data in the import file will be displayed in a grid format. Review the file and once done, select the NEXT button.
The next screen in Importer is the mapping screen. Required QuickBooks Fields are depicted in red in the first column (Customer, RefNumber, Item). Select the appropriate column from the import file that corresponds to the QuickBooks Field. To assist in mapping the import file, review the Data Dictionary.
Once completed, click SAVE AS to save the mapping. Select NEXT to continue to the next screen.

This next screen shows how the data will be mapped to each QB field. Review this data to make sure that it is mapped correctly. Select the NEXT button.

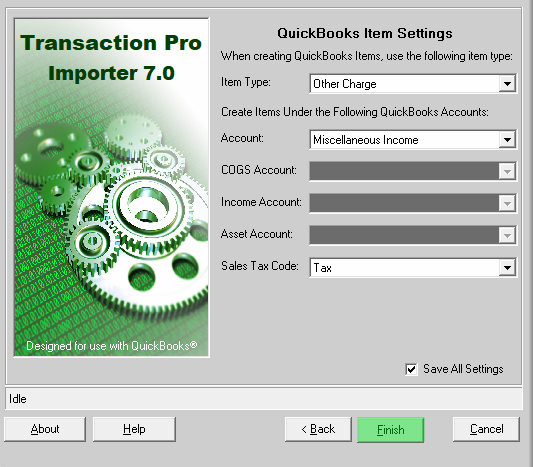
On the last screen of Importer, select how any new Items that do not exist in the QB company file will be set up by making selections from the drop-down menus. Please note that this last screen needs to be completed even if no new Items exist in the import file.
Select the FINISH button to start the import.
Advanced Tips and Options:
There are also many other Options that should be considered, which are highlighted in below. All of these Options are discussed in detail in the Help File, which can be accessed by selecting the HELP button on any page within Importer or by pressing the F1 function key on the computer keyboard while Importer is open.
Basic Options tab:

Advanced Options tab:


